
I made this project to continue learning about simple constructions of garments with motifs, and also, to use up all my 6-ply cotton yarn! :) Only very few left!!
6-ply cotton is thick and used with 3mm (or larger) hook, a project can be quickly finished. Also, it is great yarn for making tests and experiments for a new pattern.
Anyway, I’d like to quickly make a high-neck top with motifs. First I choose a suitable motif, square. I choose one that does not have too many holes in it or at least not very large holes. A 5-ch gap is OK, also maybe 6. But bigger, for example 8-ch or 9-ch gap is too big for me whatever yarn is used.
 |
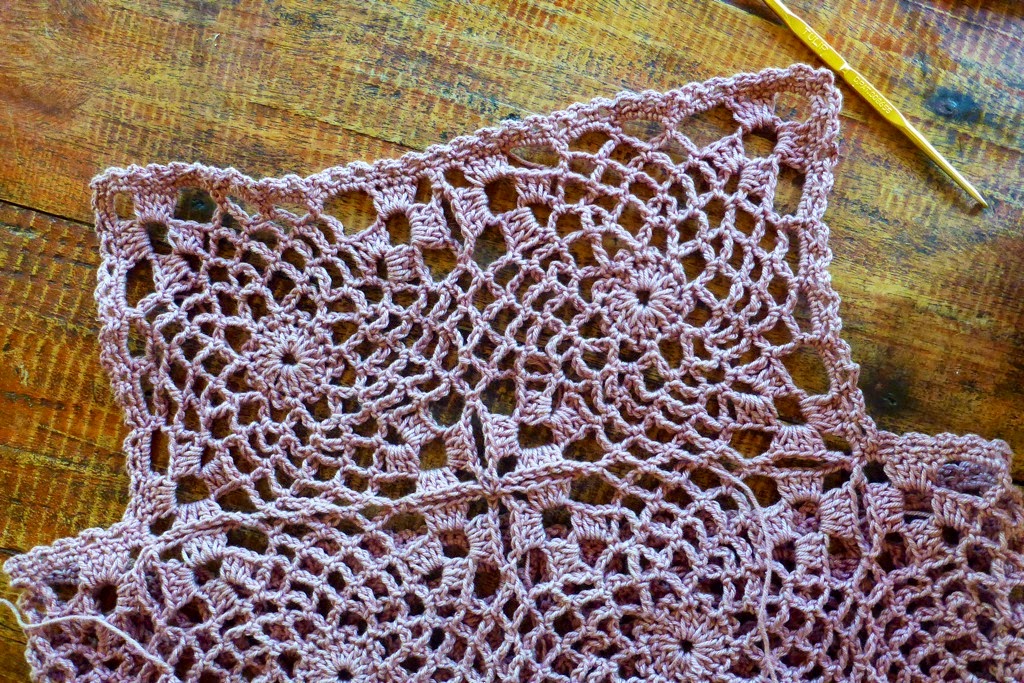
| Here’s the motif I chose for this project. I chose this because this is a big motif (7 rounds) and joins with other motifs along 6 points, a good strong join. |
I also choose a motif that has a good strong join with other motifs. If the motif has 5 rounds, I would prefer that it joins to the next motif at 4 or 5 points. If a motif has 8 rounds and joins at only 3 points then that would be a weak join creating a weak unwieldy fabric with large holes between the motifs. So find a motif that has sufficient points joined. The motif I am using has 7 rounds and joins at 6 points. Perfect!
 |
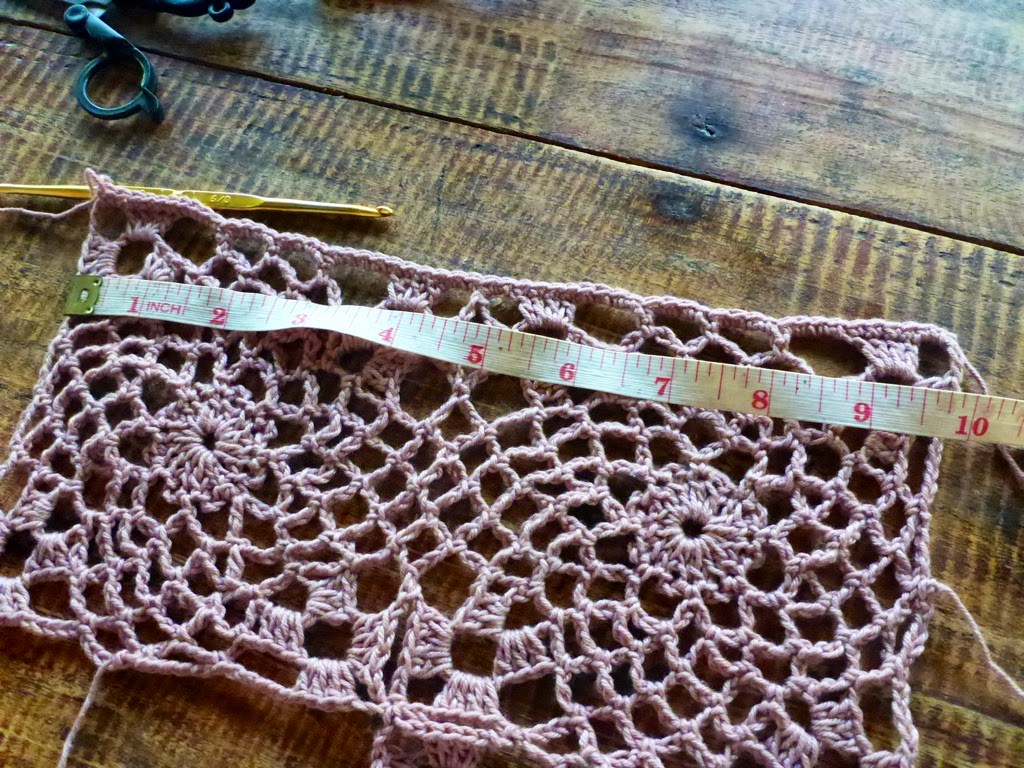
| Complete a motif then block it lightly, then measure. From the measurement of one motif, you can plan the layout of motifs for your garment. |
Then I measure the motif. My motif is 5 inches wide. This gives me some idea as to how many motifs I will need to make a high-neck top, to go all around the body. This is also tells me if I can use the same motif to make the straps of a sleeveless top. Or maybe the motifs are big enough also to cover a small cap sleeve. Perhaps there isn’y enough yarn so I can make a backless top with spaghetti straps. Is the motif too big when I leave a gap for the armholes? Can I adjust the gap? Or do I need to make half motifs?
 |
| Here, two motifs are joined and measured. |
Sometimes, when I make a motif and join them, the motif determines the final outcome of the garment design. For this particular project, I don’t have a big stock of yarn, so I will keep everything simple and basic. Here is a simple layout diagram for two sizes (below). I would like to experiment with larger sizes later when I finally get a dress form in large size.

 |
| I make a picot edging along the two motifs and measure. The picot edging makes the motifs a bit smaller. |
Then I try to make a trim along the edge of at least two joined motifs to see if the motifs will change their size. This is a lacey edging, above, following the crochet pattern chart.
Here (below) is a simple sc edging which keeps the size of the motifs the same. The lacey edging above made the motifs smaller by about a fourth of an inch.
 |
| Here’s a simple sc edging which keeps the original size of the motifs. |
For a bust size 30” you’ll need to join 6 motifs together. Maybe 7 motifs for positive ease, depending on the yarn you use – is your yarn stretchy or not? Is the yarn suitable for 0 or negative ease crocheted garment? Anyway, I think this motif would not look nice for negative ease garment.
 |
| Join more motifs and measure. |
Then join more motifs and see how it goes. For my top I need two motifs for the front that makes up the high-neck part of the garment. There will be one motif that go under the armpit each and two motifs to make up the low-back design. This is a total of six motifs.
 |
| Two motifs above make up the high-neck of the garment, and the rest of the motifs below and at the sides go all around the body. |
 |
| The motifs that go over the bust are completed here. |
 |
| This third row of motifs go over the high-waist and is crocheted with a smaller hook, size 2.5mm, to shape. |
 |
| Edging is worked all along the neck, armholes and back of the top. Edging is simple, two rounds: first round is all sc with a smaller hook, second round is loops of 3-ch with the same hook. Remember to experiment with the edging – you can make the edging tighter to shape the neck and armholes, or looser, if necessary. In my project, I made the edging a bit tighter for a good fit along the arms and back. |
 |
| The bottom of the top is crocheted with a lacey edging. See the crochet symbol chart below. |
 |
| The second edging shown here is the one I used for the top. |
Choosing an edging is not so hard. If you don’t find one you like ten you must make one or modify an existing one. I choose first on the basis of the foundation stitches of the edging. For example in this project, I could easily make a foundation of 5-ch loops all along the edge of the motifs. So now I must look for an edging that works on 5-ch loop foundation, of the same multiples of loops. If there are not the same multiples, then I can alter the pattern.
Next is the shoulder straps for the top. My decision is to make simple thin straps. You can make fancier ones, wider or with lace. Mine is just a chain made from two strands of the same cotton yarn.
 |
| The finished motif top. I finished this in one day. |
 |
| Because I still had some yarn leftover, I decided to put tassels at the end of the straps at the back, and fringes all along the hem of the top. |
After finishing the top, I decided that it would need an undergarment, also crocheted, so that I wouldn’t need to wear a bra underneath. So I crocheted the bra cups from The Camisole Exercise #1 and sewed them onto the underside of the motif top (photo below). I include the camisole pattern below for your reference.
 |
| Crocheted bra cups serve as pockets for the bra pads. |
I am very happy with the outcome of this quick little experiment. This motif top was finished in less than one day. With more yarn, it is possible to make a dress or a longer top. Next time I will try to make one that has sleeves.
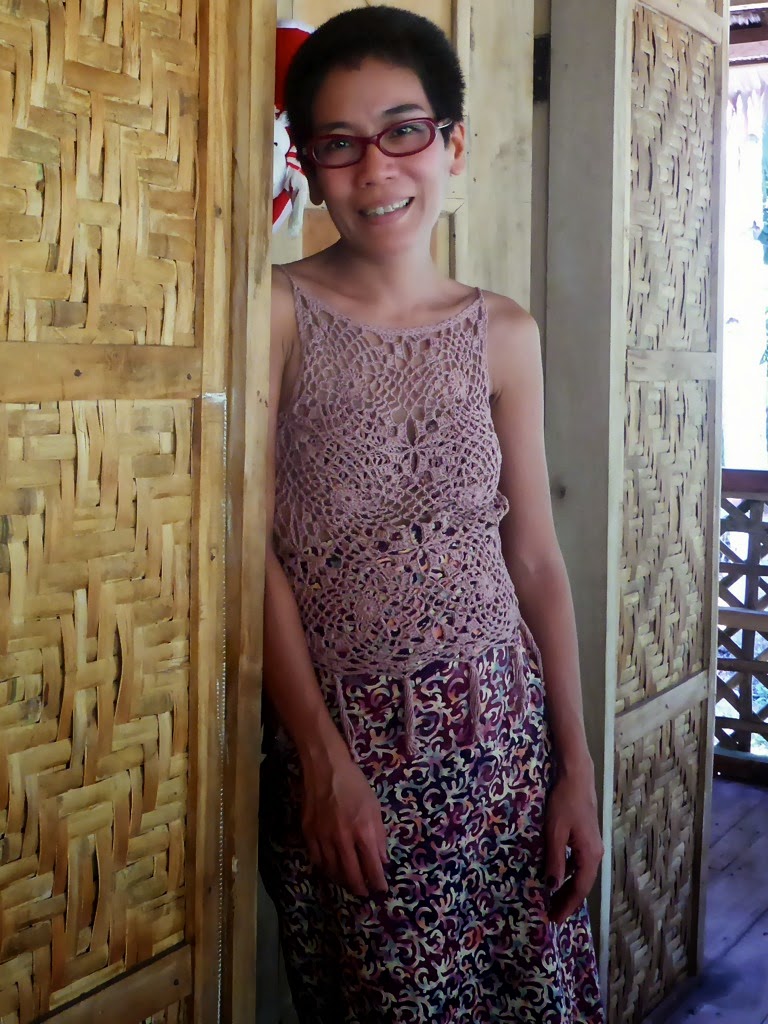 |
| The finished Motif Top – a very quick and easy project. I added fringes along the hem of the top. |

 |
| At the back, I put tassels at the end of the straps. The straps can be untied and adjusted at the back. |
Now you've done it!! You've given me just enough inspiration to go looking for a Motif for a similar looking cami Or Motif top. I will have to let you know if I come up with anything. I have several motif books. I love looking at these Motifs. So to make a project with one is very intriguing to me.
ReplyDeleteThx for the inspiration!!
🙋🏼 Laurie
Thank you, Laurie! I love working with motifs too, I like that it is like a brick you use to build something with. There are more motifs project at http://www.crochetology.net/search/label/motifs Enjoy! :)
Delete