I have plenty of scrap yarn and yarn from ends cut from finished crocheted projects. I think it is a good idea to keep all these scarp yarns because they can be used. I have used scrap yarn as filling for crocheted toys and crocheted embellishments like balls.
So yesterday I decided to collect all these scrap yarns, tie them together to make a new yarn – multicolour.
 |
| Multi-color yarns can be easy to make! |
 |
| Just tie the scrap yarns together. Even short yarns can be used. |
Sometimes, I cut a long piece of yarn to change colours more often. So this DIY multicolour yarn is perfect if you have very short yarns or yarn that is a tangled mess that you have to cut it.
 |
| I managed to make a large cone of yarn last night – all from scrap. |
Don’t worry about the knots, don’t cut them short, they are very pretty when you make a crocheted item with the yarn. This is particularly great if you have weaving in ends of yarns in your projects – no need to weave in ends of this one!
 |
| Testing my DIY multicolour yarn. |
My DIY multicolour yarn is made up of 3-ply, 4-ply and 6-ply cotton yarns of various colours. After making a considerable amount of yarn, I decided to test it by making a simple camisole. The bra part of the camisole is easy to make, here is the crochet symbol chart.
This pattern is especially for using fine hook and yarn, maybe 2mm hook and 3-ply yarn. I used 3.5mm hook and yarn up to 6-ply so I started with a smaller number of stitches. I started with 10 ch, then dc in fourth chain from hook and then dc in each ch to make a total of 8 dc. Then I follow the pattern for turning to the other side of the chain, which is 2dc-ch1-2dc at the tip of the chain. Then dc all along the other side of the chain. I made 16 rounds of this to make the suitable size of bra. Feel free to modify yours to create the size you need.
 |
| Finish two cups. |
 |
| Join the cups along the side. |
 |
| Make the trim for the cups. |
 |
| Go all around the cups to make the trim, increasing stitches at the turning corners. |
 |
| Make the trim all around the cups, remember to increase at the corners. There is more increase at the sides of the cups than at the top. |
 |
| When the trim is finished the bra band is next. |
 |
| Working on the bra band. |
 |
| The bra straps completed. |
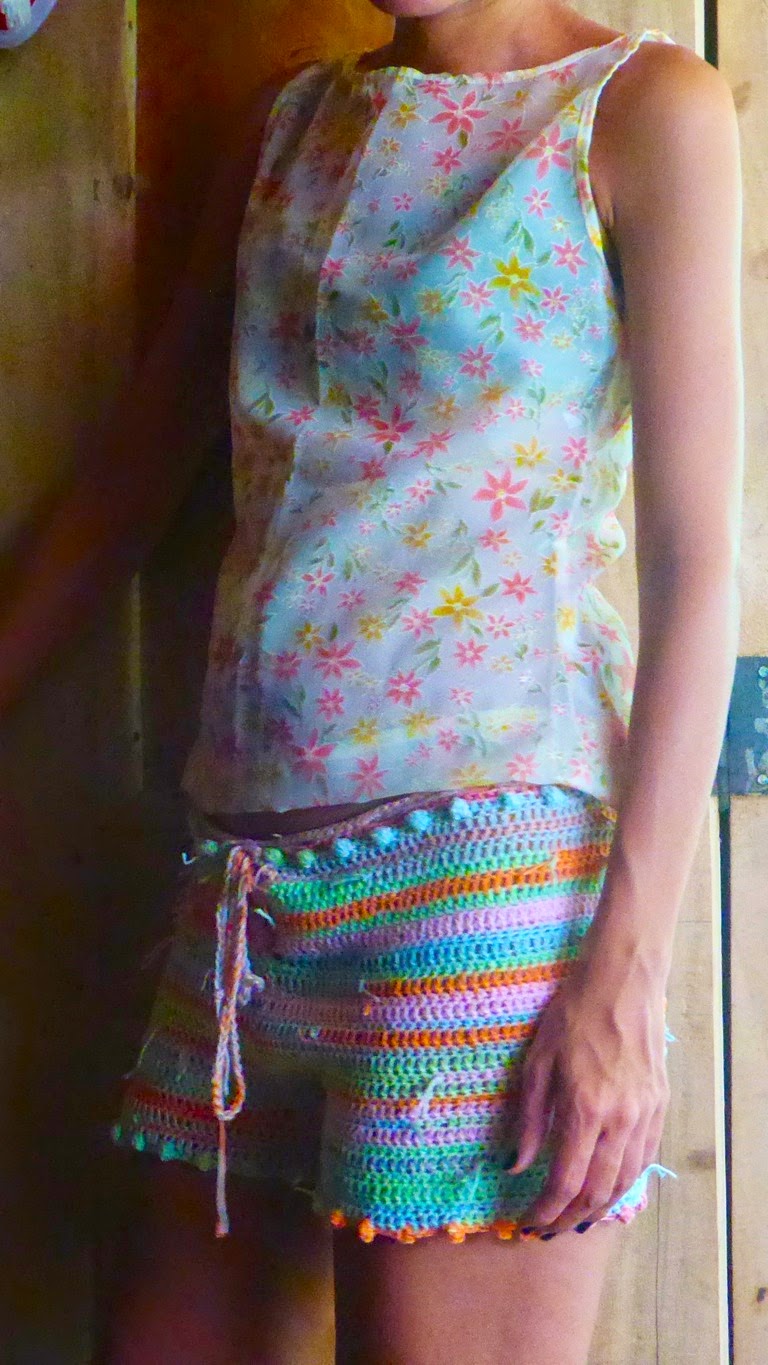
Making a Pair of Shorts
I also made a pair of shorts using the DIY multicolor yarn. Here are progress and finished pics. More information about making a pair of shorts may be found at
"Quick House Shorts."


Comments
Post a Comment