Sleeve Test 1 (Cap Sleeve Top)

I like making sleeveless crochet garments because they are comfortable in our tropical climate, especially that crochet fabric tends to be quite thick and thus warm. However, another reason why I prefer making sleeveless garments is because I am terrified of making/shaping sleeves, armholes and joining sleeves.
This is an attempt to understand crocheted sleeves and sleeve joining. I'd particularly like to look at easy ways of making sleeves, those that involve no seaming or joining. Then later, look at an easy way of joining sleeves.
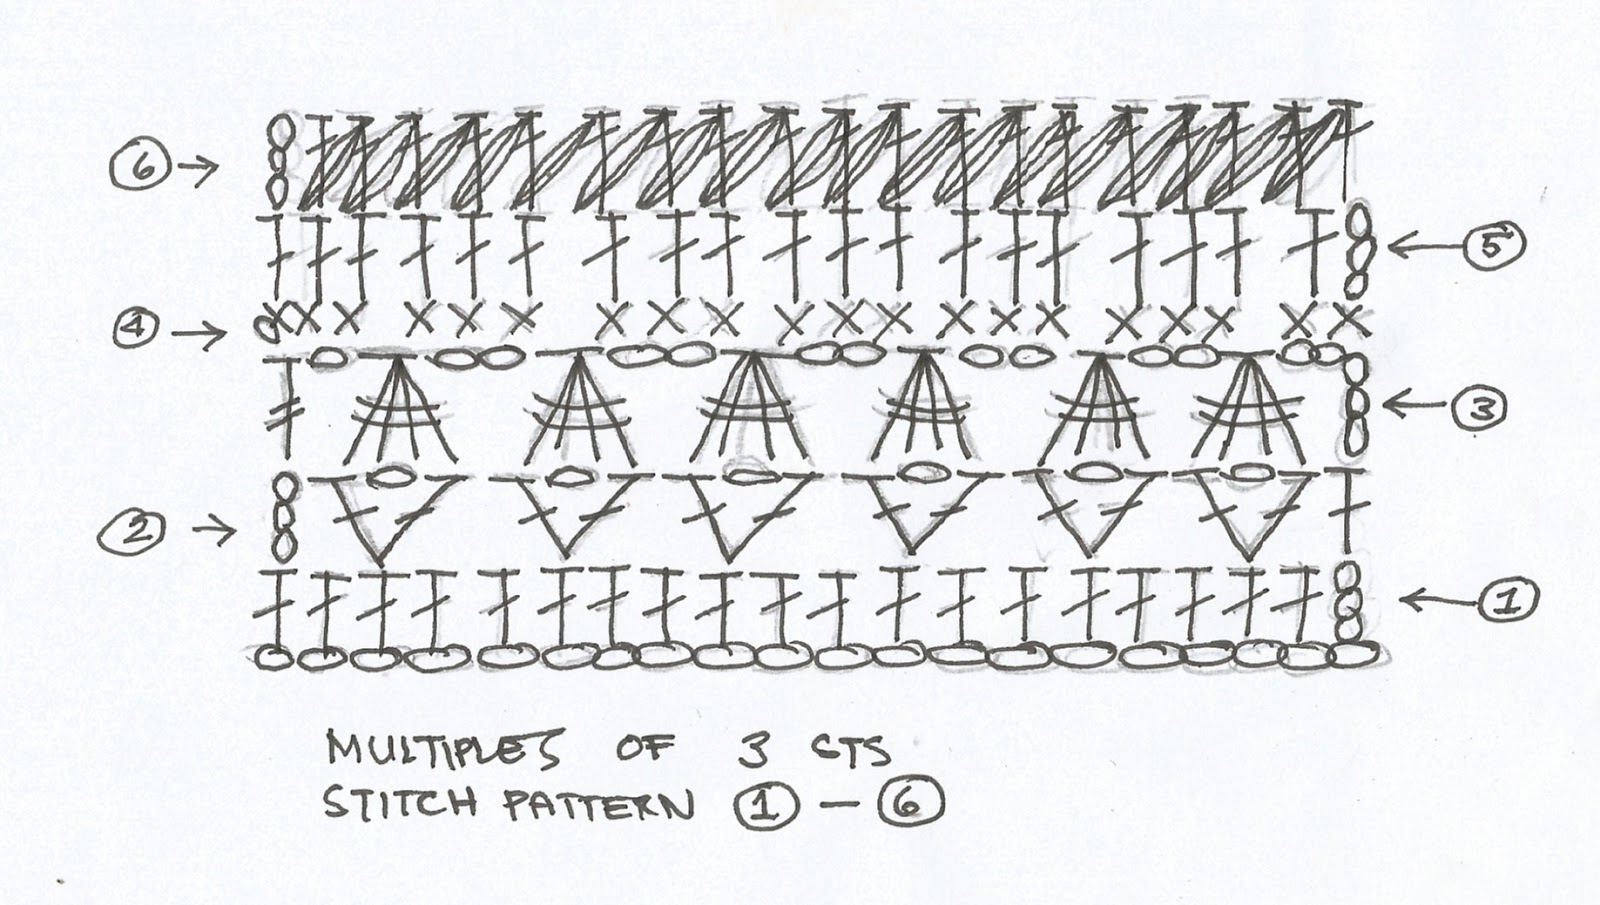
First try is the simple cap sleeve. So I tried making cap sleeves last night, not by working the sleeve separately but but working around the armhole. I used 4-ply yarn and 3.5mm hook. Here (below) is the stitch pattern and the schematics.
This is an attempt to understand crocheted sleeves and sleeve joining. I'd particularly like to look at easy ways of making sleeves, those that involve no seaming or joining. Then later, look at an easy way of joining sleeves.
First try is the simple cap sleeve. So I tried making cap sleeves last night, not by working the sleeve separately but but working around the armhole. I used 4-ply yarn and 3.5mm hook. Here (below) is the stitch pattern and the schematics.

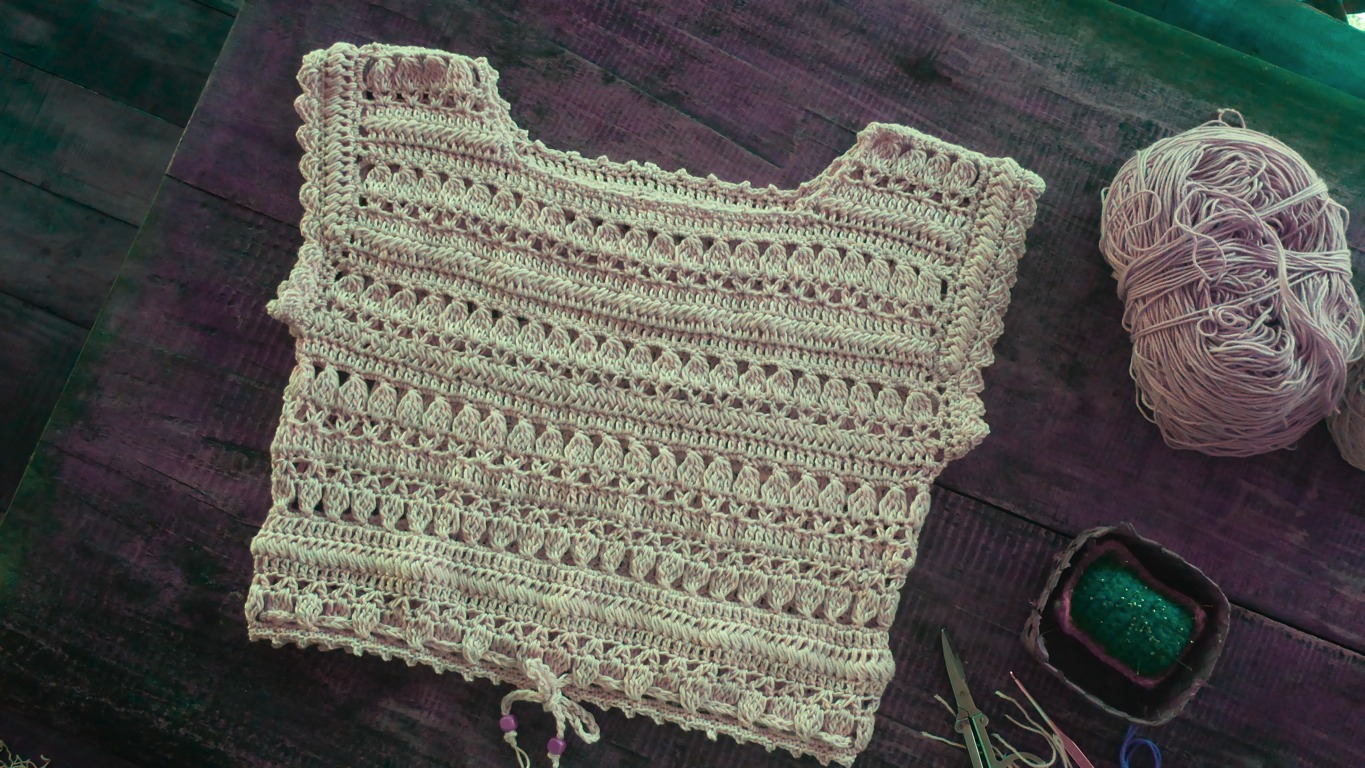
After making the bodice, I proceeded with the sleeves. Here (photo below) is an early attempt. On the left is without sleeve and on the right is with sleeve worked around the armhole - the row is shorter under the armpit and longer over the shoulder, thus creating a cap-sleeve shape.

Below is a closer view of the sleeve. Taller rounds over the shoulder and shorter rounds near and under the armpit, and the last row of scallops. The crochet symbol chart for this sleeve is provided in the above illustration, with the crochet symbol chart for the stitch pattern.


Here, below, are two earlier variations which were OK. The general idea is to use shorter rows under the armpit and then longer rows over the shoulder.
I also notice that it is not easy to make a good decrease to taper the sleeve when working all around the armholes. This is why such sleeves are often worked in rows, with the decrease to taper towards the cuff, then seamed.

And here are more photos of the finished top. I'm very happy with the result and next I'd like to try longer sleeves, not a cropped top like this but perhaps a jacket with an open front, or a bolero with long and three-quarter sleeves.


Comments
Post a Comment