One Skein Maltese Crochet Collar

Make this intricate Hairpin Lace collar with just one ball of yarn.
Finished Measurements: The middle ribbing of the lace strip measures approximately 14 1⁄2 inches. The standard choker length for women's necklaces is 16 inches; 17-18 inches will reach the collar bone. Take your own measurements. The length of the collar depends on the number of loops you make in hairpin lace. Adjust the number of loops according to your size. 22 loops is approximately 15 inches.

The Hairpin Lace Collar may be worn with a simple sleeveless top or a turtleneck outfit. Try making the Collar with lacy cotton thread for finer detail.
You will need
Yarn: Acrylic yarn, fingering
Color: One ball of yarn (about 25g) yellow
Gauge: Crochet button diameter=1.5mm
Terminology: Pattern is written using US crochet terminology
Or size to obtain gauge
Staple: Hairpin lace staple, 4 inches
Notions:
Sewing needle and scissors
Steel pins, size 26mm
Gold thread
Plastic stone with flat backing, blue (0.75mm), 7 pieces
Metal 's' hook (tiny metal snaps, 'automatics' or hooks are also suitable)
Instructions
Collar: Using yarn and 4-inch hairpin lace staple, make a strip of 22 loops on each side.
Fasten off and remove strip from staple.
Starting at one end of strip, twist two loops one at a time and sl st together, ch 6 and continue twisting two loops one at a time and joining together with sl st. Repeat until the last 2 loops. You should now have 11 joined loops with 6 ch between each of them. Fasten off.
Repeat as above for loops on other side but this time make ch 4 instead of 6.
Collar Edging: On side of strip joined with ch-4, attach thread with sc to sl st at tip of first joined loop. Ch 3, dc in next sl st at tip of second joined loop, ch 4, sl st in 3rd ch from hook (picot made), ch 1, dc in same sl st at tip of joined loop, ch 4, picot, ch 1, dc in same sl st at tip of joined loop, ch 3, sc in next sl st at tip of third joined loop.
Repeat this process to the last joined loop. Fasten off.
Decorative buttons: (Make 7)

With gold thread or matching color thread, sew the plastic stones onto the center of the crochet rings to complete the buttons.
Ch 4, sl st in first ch to form ring.
Rnd 1: Ch 1, 9 sc in ring, sl st to first sc to join. Fasten off. With gold thread, sew plastic stone in center of ring.

Attaching the buttons to the strip:
Sew a button to one end of the strip and crochet a button loop at the opposite end aligned to the button.
Arrange the rest of the buttons on the strip and use pins to temporarily hold them in place. Put on the collar to see if you are happy with the arrangement, otherwise, unpin the buttons and rearrange them. When satisfied, sew the buttons in place.
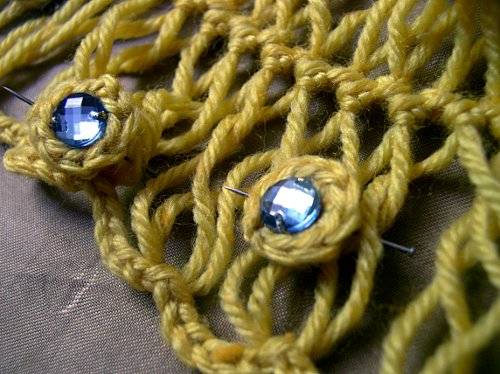
Use pins to temporarily position the buttons on the strip.
On the same end of the strip where you have the button loop, attach the 's' hook in the stitch at the corner of the edging (see photo below). Use long-nose pliers to press the hook into place. This hook latches on to the edging at the opposite end of the strip and will keep the upper loops of the collar upright when you wear them. (Another style of wearing the collar may be to fold down the upper loops of the collar).

Attach the 's' hook at the corner of the lace edging. This hook latches on to the edging at the opposite end of the strip and will keep the upper loops of the necklace upright when you wear them.
Finishing: With floss thread or matching color thread, sew stitch ends to secure them. If you have fabric glue, you can use that instead to seal loose ends. Block to shape and finished measurements.
Got more yarn? Make more buttons!
Instructions for Hairpin Lace/Maltese Crochet:
From “Priscilla Yoke Book, Crochet and Tatting” published by the Priscilla Publishing Co., 1916. (See illustration below)

- Tie the thread around the staple;
- Put the hook under the lower thread and draw a loop of thread under and up;
- Thread over hook and draw through.
- Turn the staple from right to left, carrying the hook up over the rounded end to the back side.
- Working from back side, insert hook under loop on left prong, draw thread through, thread over, and
- Draw through both stitches on hook.
- Turn staple from right to left, bringing hook to upper side of work, insert hook under forward loop as before, draw thread through, thread over hook and draw through both stitches.
To learn more about Hairpin Lace, read the chapter on Hairpin Lace in Crochet Work in the Encyclopedia of Needlework by Therese de Dillmont.
Happy Crocheting!


Comments
Post a Comment